
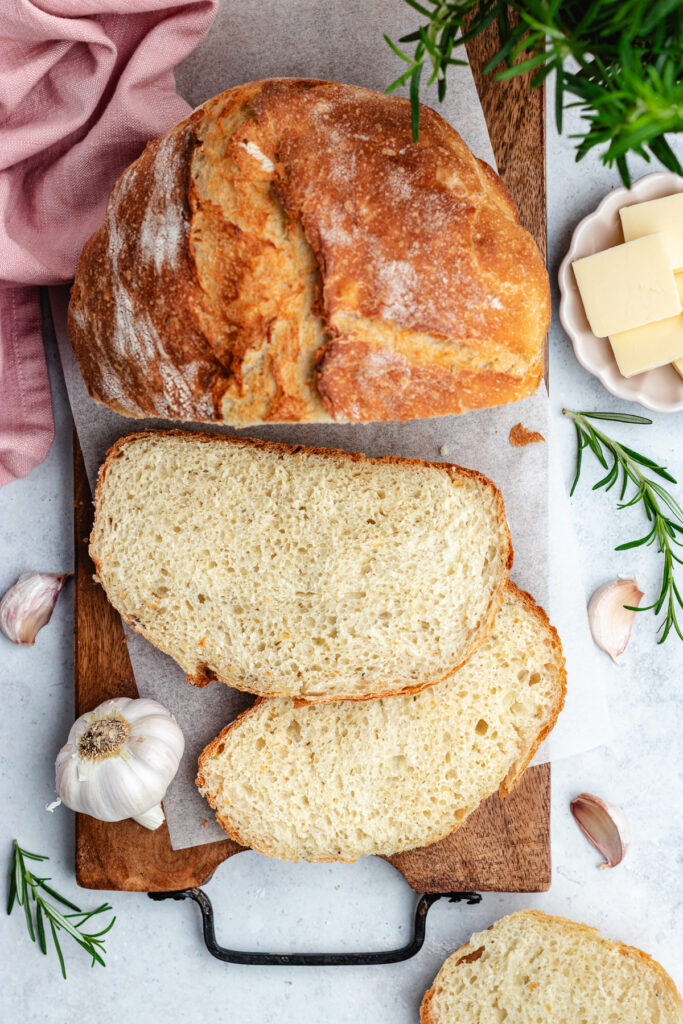
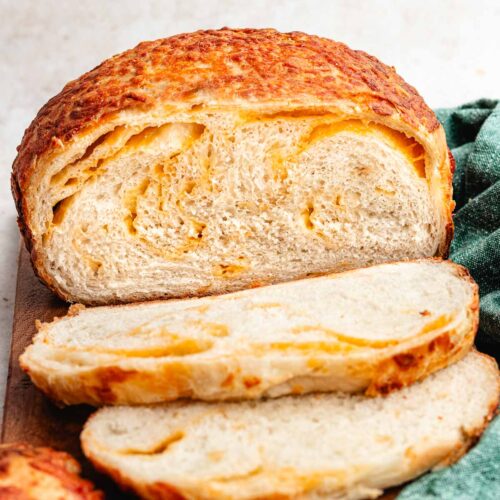
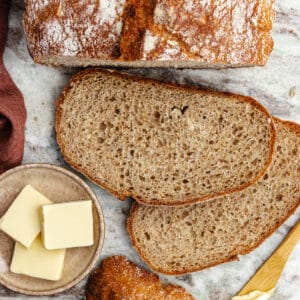
This Dutch oven garlic bread is easy to make and loaded with flavor. A no-knead, same day bread recipe, that delivers a crisp crust with a light and airy interior. The roasted garlic ads a mild and rich garlic flavor, combined with a hint of rosemary.
Making artisan-style bread at home doesn’t have to be complicated, or time consuming. Making a no-knead loaf like this Dutch oven garlic bread, is a great option. It bakes the same day and is easy to make, with very little hands on work. The roasted garlic and rosemary adds extra depth, for a bread full of flavor just like this No knead olive bread. Another great dutch oven no knead bread to try is this easy Whole Wheat Bread.
Jump to:
Ingredients
To make this roasted garlic dutch oven bread, all you need are a few ingredients, listed below.
For the full ingredient measurements, scroll down to view the recipe card at the bottom of the page.
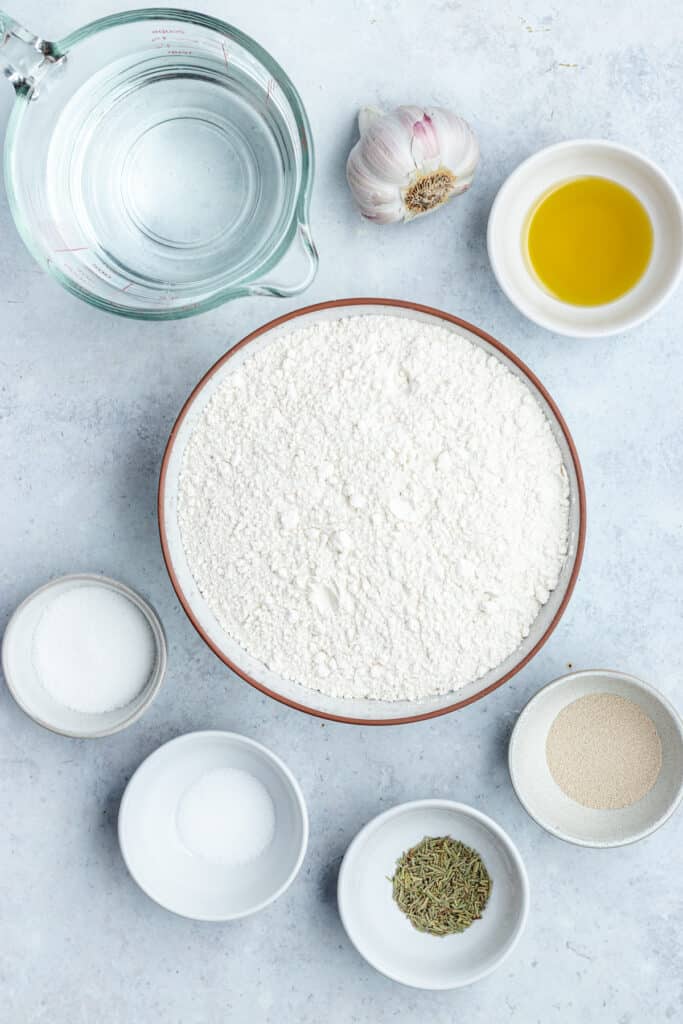
- Luke warm water, the water should be warm, but not hot to the touch or it will kill the yeast. Around 110F (40C) is a good temperature. Just a little warmer than the body temperature.
- Active dry yeast, make sure it is fresh (not expired) for the best result.
- Sugar, just a little, it helps activate the yeast.
- Bread flour, use a good quality flour. Using bread flour will give a lighter and fluffier texture. But all-purpose flour also works. I prefer to weigh the flour when baking, that will give the most accurate amount, and the best loaf of bread.
- Dried rosemary, or fresh chopped rosemary.
- Salt, bread needs salt to bring out the flavour, use kosher salt or regular table salt.
- Garlic, use a whole head of garlic for this bread that gets roasted in the oven for a mild and rich garlic flavor.
- Olive oil, for roasting the garlic and it will give the bread a softer texture.
See recipe card for quantities.
Instructions
This no knead garlic rosemary bread is easy to make, follow along with the step-by-step photos below.
For the full instructions see the recipe card at the bottom.
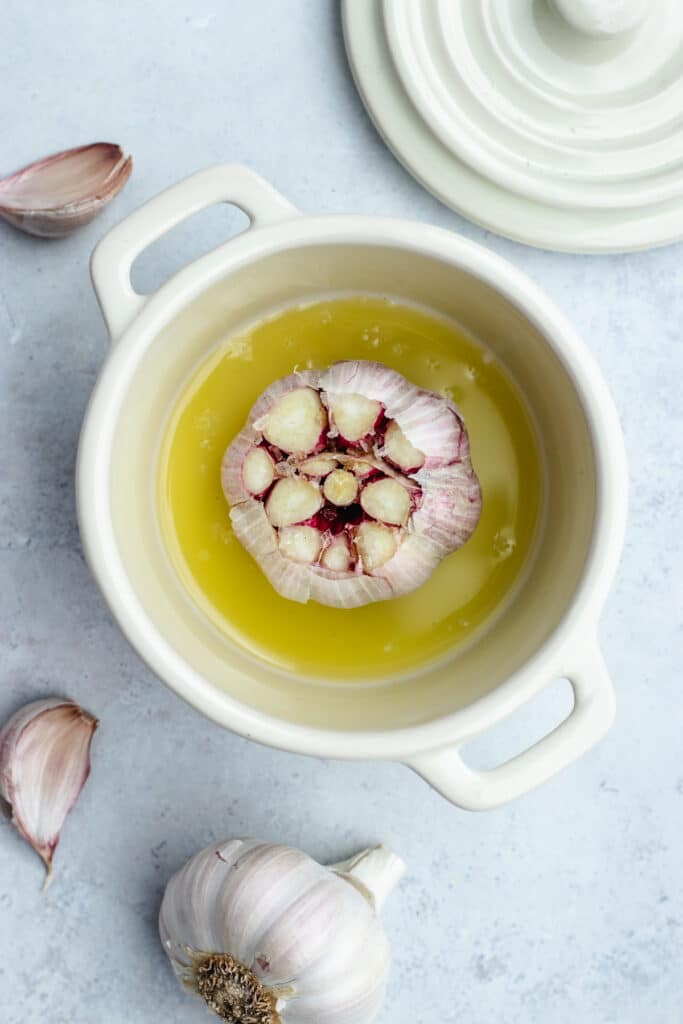
- Step 1: Trim the top off a head of garlic to expose the cloves inside. Place garlic in a small baking dish and drizzle with oil and a pinch of salt.
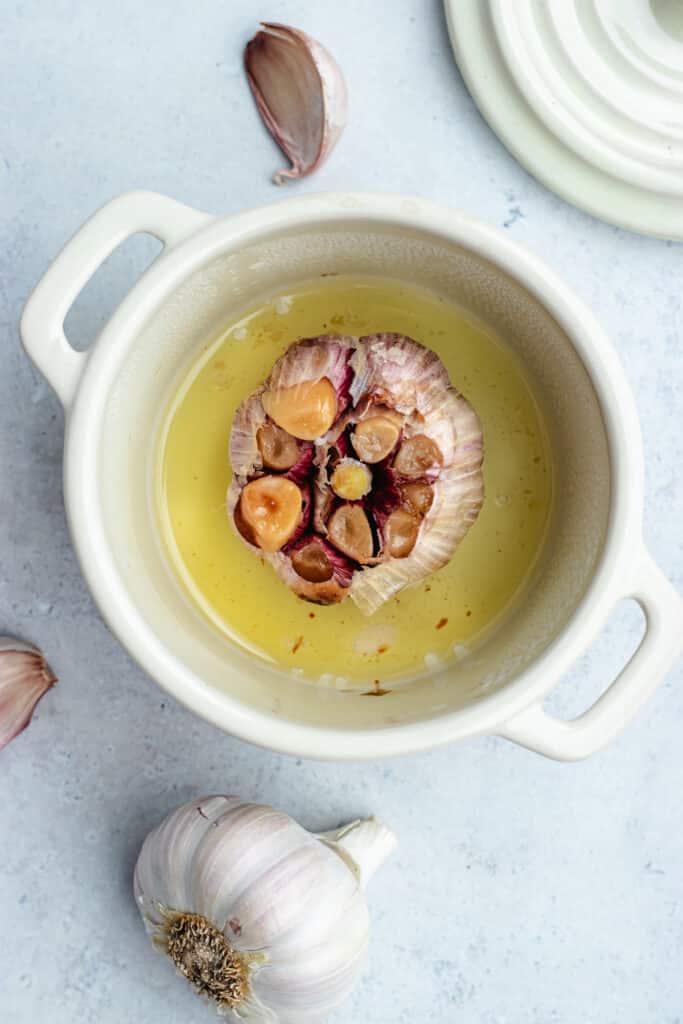
- Step 2: Cover the garlic with the lid (or foil) and bake until the garlic cloves are soft and slightly browned. Remove from oven and set aside to cool. Squees out the cloves and mash them with a fork with the olive oil from baking.
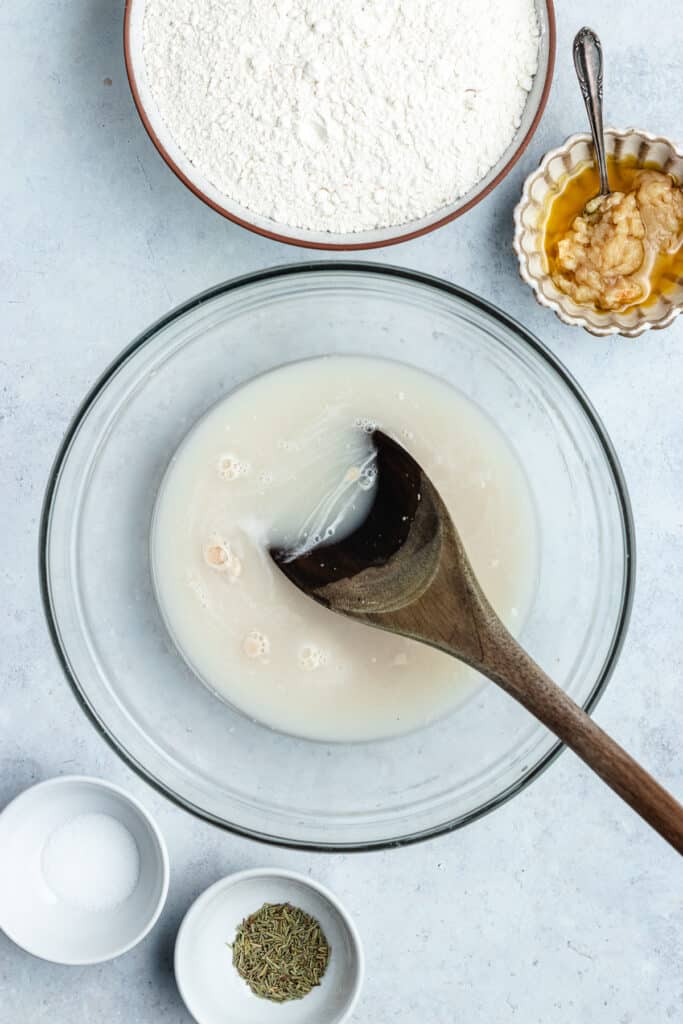
- Step 3: In a mixing bowl, add the lukewarm water, sugar and yeast. Let it sit for 10 minutes until the yeast is foamy.

- Step 4: Stir in the mashed roasted garlic, olive oil and the rosemary.

Step 5: Add the flour and salt and stir well with a spoon. The dough will be loose and sticky.

Step 6: Cover the bowl with plastic wrap or a clean kitchen towel and let it rise in a warm and draft free spot until double in size.

Step 7: Gently fold the outer edges of the dough to the center to form a ball, pinch it closed with your fingers. Flip it around, cover with a kitchen towel and let rise for 30 minutes until the Dutch oven is hot.

Step 8: Carefully take out the Dutch oven, it will be very hot!
Remove the lid and gently lift the bread with the parchment paper and place inside. Cover with the lid and bake, then remove the lid and bake.
(Optional: Scoring the top of the dough with a sharp knife, gives it a controlled place to expand, preventing uneven cracking).

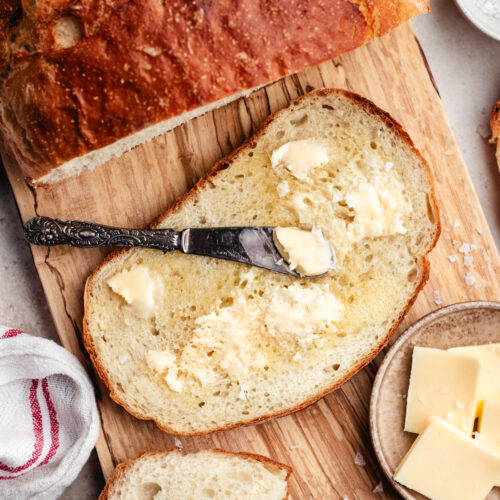
Hint: Let the no knead garlic bread cool down for about 30 minutes before you slice it.
Substitutions
- Flour – For the fluffiest bread with the best texture, I recommended using bread flour. It has a higher protein count that really helps the texture. But all-purpose flour also works well.
- Rosemary – This dutch oven rosemary bread has dried rosemary that ads so much flavor. Freshly chopped rosemary can also be used, or you can omit it if you don’t like rosemary, or use some fresh or dried thyme instead.
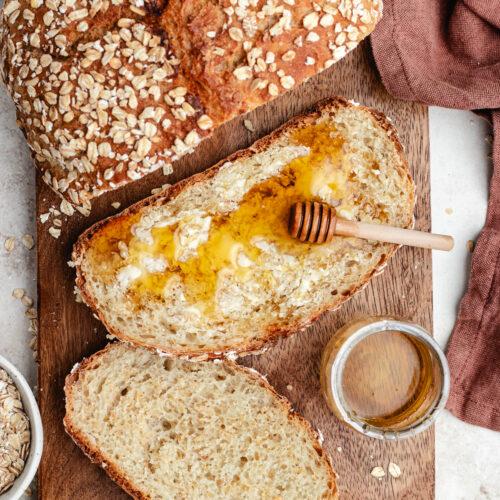
- Sweetener – This dutch oven rosemary bread has a little sugar added to the dough, it is only to help activate the yeast. The bread wont taste sweet, a small amount of sugar helps the rising process. If you like a sweeter bread, add more sugar or a little honey, to taste. Also check out this No knead oatmeal bread or this No knead cinnamon raisin bread for a sweeter style bread.
Variations to try
- Olives – Mix in olives of choice or try this No knead olive bread recipe.
- Nuts – For some added crunch and flavor, fold in some roughly chopped nuts like walnuts or pecans, to the dough. Also see this Cranberry Walnut Bread loaded with walnuts.
- Cheese – For a cheese garlic bread, add some shredded cheese, like mozzarella, cheddar or parmesan to the dough.
- Seeds – Top the bread with some crunchy seeds, pumpkin or sunflower seeds are good options like in this no knead Mulitseed Bread.

Roasting Garlic (Key Step)
Oven roasting a whole head of garlic is where the magic happens. Roasting the garlic will create a mild and rich garlic flavor, less sharp than raw garlic. The natural sugars begin to caramelise, creating a more balanced flavor.
For the best result, roast the garlic until it is soft and just lightly golden, but not burnt. Burnt garlic will taste bitter. Once roasted, the garlic should soft and creamy, easy to mash into a smooth with the olive oil, before adding to the dough.

Why bake the bread in a Dutch oven?
Baking your bread in a Dutch oven will make a big difference to the bread. It creates a crispy crust, while the center stays soft and fluffy. Why? Because the Dutch oven helps trap the steam inside, and that will help the bread rise higher, while crating a great crust. It is one of the easiest ways to bake an artisan style bread at home.
Can I bake bread without a Dutch Oven?
Yes, you can still make this bread without a Dutch oven. The goal is to recreate the steam, and heat, that help the bread rise properly and develop a crisp crust. While both methods work, a Dutch oven is always the best option for the most consistent rise and crust.
- Baking sheet method: Place the dough on a baking tray lined with parchment paper. To create steam, place a small oven-safe dish filled with hot water at the bottom of the oven. Or pour a small glass of water in the bottom of the preheated oven (not on the bread), just before closing the oven door. Bake until the loaf is golden and fully set.
- Cast iron skillet method: Preheat a cast iron skillet in the oven like you would do with the Dutch oven. Place the dough directly onto it with the parchment paper. Cover with an oven-safe bowl (glass, ceramic, or enamel) to trap steam, and bake as you would in a Dutch oven.
A few extra tips:
- Preheat the oven, so the bread goes in when it is at the right temperature.
- Work quickly once the dough goes in, so heat and steam wont escape.
- If the crust didn’t brow enough, bake uncovered for a few extra minutes.

How to store homemade Dutch oven bread
This garlic dutch oven bread absolute best the day it is baked, like any bread. The crust is crisp and the inside soft and airy. That said, it holds up well for a few days if stored properly.
Store the bread at room temperature in a bread box, wrapped in a clean towel, paper bag or in a container that allows a bit of airflow. It can also be kept in a plastic bag, but the crust will become a little softer. It keeps well for up to 3–4 days. I like to pop the sliced leftover bread in the toaster, that brings back both the texture and flavor, especially when topped with butter or olive oil.
For longer storage, slice and freeze this rosemary garlic bread for up to 3 months. Store in a freezer safe bag, removing as much air as possible before sealing to prevent ice buildup.
Let it thaw at room temperature, or toast slices directly from frozen.

My top bread baking tips
Getting consistent results with no knead bread comes down to understanding a few fundamentals.
- Use bread flour – The type of flour matters, bread flour has a higher protein content, this will give a lighter bread with more structure. All-purpose flour will also work, but bread flour will give a better all around result.
- Slightly sticky dough – The dough texture should be soft and slightly sticky—if it feels dry or stiff, the bread will be dense and dry. This is why it is so important to measure the flour correctly and preferably weigh it with a kitchen scale.
- The rise – The dough needs enough time to fully rise and develop flavor, rushing this step often leads to an under proofed bread, that will be more compact and dense. Leave the dough to rise in a warm and draft free spot and depending on the temperature in your kitchen, it might need a little more time to rise.
- Preheating the Dutch oven – another important step, it will create a crispy cruse and soft and fluffy interior. Let it heat in the oven while the bread has the second rise for the best result.
- Scoring – this is optional but a great way for the bread to expand and bake high. It will result in a prettier loas and prevent uneven cracking.
- Baking with the lid – baking the bread with the lid on to start helps trap the steam inside the dutch oven and helps the bread to bake higher. Removing the lid and baking the last 10-15 minutes uncovered will create that crispy, golden brown crust.

FAQ
Yes, but roasted garlic gives the bread a better flavor, it is milder and more balanced. If using raw garlic, mince about 4 garlic cloves and add them with the oil to the bread.
Yes, if you have time letting the bread rice slowly overnight is a great idea! Reduce the yeast to ½ teaspoon and place the dough in the fridge for 10–12 hours (or up to 24 hours).
Take the dough out of the fridge and let it sit on the counter for about 1 hour to come to room temperature. Shape and continue with the second rise according to the recipe. It might need a little longer for the second rise, you want the dough fluffy and light.

More bread recipes

Muffin recipes


I WOULD LOVE TO HEAR FROM YOU!
Let me know what you think by leaving a comment down below, and tagging me at @thedeliciousplate in your picture on Instagram. Your feedback is so helpful! Also, don’t forget to subscribe to my newsletter to be sure not to miss my latest recipes!

This Dutch oven garlic bread is easy to make and loaded with flavor. A no-knead, same day bread recipe, that delivers a crisp crust with a light and airy interior. The roasted garlic ads a mild and rich garlic flavor, combined with a hint of rosemary.
- 1 head of garlic
- 1 tablespoon olive oil
- pinch of salt
- 1 ½ cups (340g) warm water
- 2 ¼ teaspoon (7g) active dry yeast
- 1 tablespoon granulated sugar
- 3 ½ cups (450g) bread flour, and more for dusting
- 1 teaspoon salt
- 1 teaspoon dried rosemary (or 1 tablespoon fresh chopped rosemary)
-
Preheat the oven to 400F (200C)
-
With a sharp knife, trim just the top off a head of garlic to expose the cloves inside. Place garlic in a small baking dish that has a lid. If you don't have a lid, cover, or wrap the garlic in aluminium foil.
-
Drizzle garlic with olive oil and sprinkle with a pinch of salt.
Cover the garlic with the lid (or foil) and bake for 30-45 minutes (depending on the size of the garlic) until the garlic cloves are soft and slightly browned. Remove from oven and set aside to cool. When the garlic has cooled down, squees out the cloves and mash them with a fork and the olive oil from baking.
-
In a mixing bowl, add the lukewarm water, sugar and yeast. Let it sit for 10 minutes until the yeast is foamy.
-
Stir in the mashed roasted garlic and olive oil and the rosemary.
-
Add the stir flour and salt and stir well with a spoon. The dough will be loose and sticky. Cover the bowl with plastic wrap or a clean kitchen towel and let it rise in a warm and draft free spot for about an hour, or until double in size.
-
After an hour, turn on your oven to 230C (450F). Place a Dutch oven with the lid in the oven to heat for about 30 minutes.
-
Scrape out the dough unto a well floured pice of parchment paper. The dough will still be sticky so sprinkle with flour so it wont stick to your fingers.
-
Gently fold the outer edges of the dough to the center to form a ball, pinch it closed with your fingers. Flip it around, cover with a kitchen towel and let rise for 30 minutes until the Dutch oven is hot.
-
Optional: Scoring the top of the dough with a sharp knife gives it a controlled place to expand, preventing uneven cracking.
-
Carefully take out the Dutch oven, it will be very hot! Remove the lid and gently lift the bread with the parchment paper and place inside. Cover with the lid and bake for 30 minutes. Then remove the lid and bake for 10 more minutes.
-
Let the bread cool down for about 30 minutes before you slice it.


Leave a Reply