
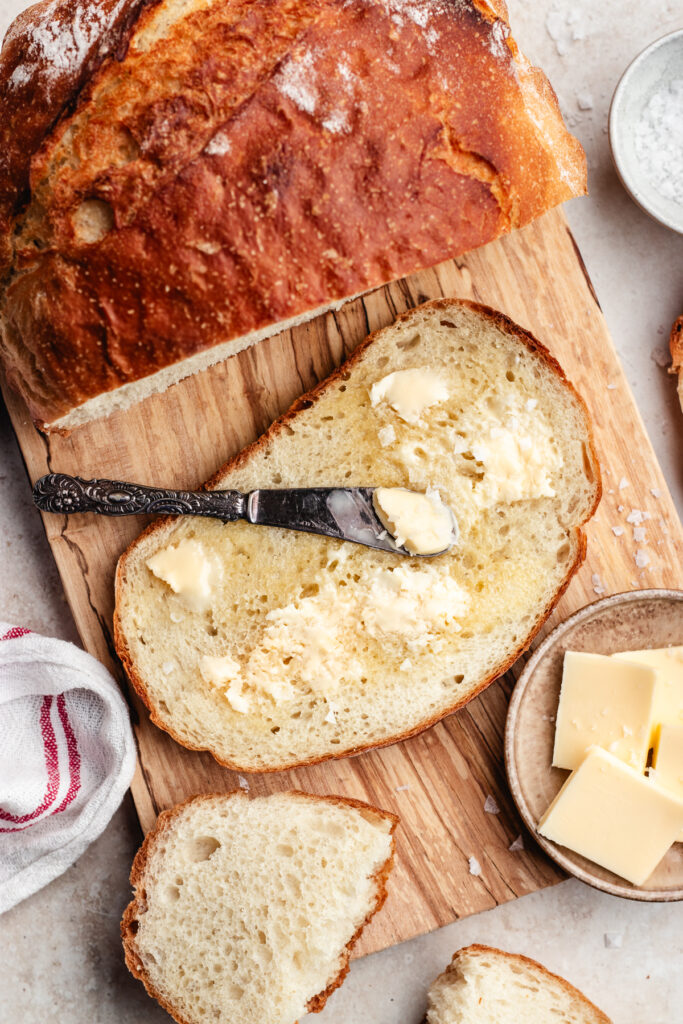
This Easy No Knead Artisan Bread only uses a few pantry ingredients to make a beautifully crusty loaf with a soft, airy center. It is the perfect recipe for homemade bread without the hassle, no kneading and no special skills required.
Making artisan bread at home doesn’t have to be time-consuming or difficult, when using this no-knead method. This recipe is perfect for beginners or if you are short on time but still want a fresh, homemade artisan bread. I have a lot of great no knead bread recipes to try, like this No knead oatmeal bread or this No knead olive bread.
This easy artisan bread is a no-knead and same day recipe, but it can also optionally be prepared at night, and then left to rest in the fridge overnight. With this no knead Dutch oven bread recipe, you can make a crusty bread anytime, with very little effort.
Jump to:
- Ingredients
- Instructions
- Optional Step: Stretch & Fold (For Better Texture)
- Why bake the bread in a Dutch oven?
- No Dutch oven?
- Substitutions
- Variations to try
- Overnight Rise in the Fridge
- How to store bread
- Pro Baking Tips (Make it perfect every time)
- Different types of yeast
- Common Yeast Mistakes to Avoid
- FAQ
- Bread Recipes
Ingredients
To make this No knead Artisan Bread, all you need are a few basic ingredients, listed below.
For the full ingredient measurements, scroll down to view the recipe card at the bottom of the page.

- Luke warm water, the water should be warm, but not hot to the touch or it will kill the yeast. Around 110F (40C) is a good temperature. Just a little warmer than the body temperature.
- Active dry yeast, make sure it is fresh (not expired) for the best result.
- Sugar, helps activate the yeast.
- Bread flour, use a good quality flour. Using bread flour will give a lighter and fluffier texture. But all-purpose flour also works. I prefer to weigh the flour when baking, that will give the most accurate amount and the best loaf of bread.
- Salt, bread needs salt to bring out the flavour, use kosher salt or regular table salt.
See recipe card for quantities.
Instructions
This rustic artisan bread is really easy to make, just stir the dough together and follow along with the step-by-step photos below.
For the full instructions see the recipe card at the bottom.

- Step 1: In a mixing bowl, add the warm water, sugar and yeast. Stir well and let sit for 10 minutes or until foamy.

- Step 2: Stir in the flour and salt with a spoon. The dough will be loose and sticky.
- Optional, after 15 minutes, wet your hands and gently lift one side of the dough, stretching it upward, then fold it over itself. Rotate the bowl and repeat this on all four sides (this takes less than a minute).

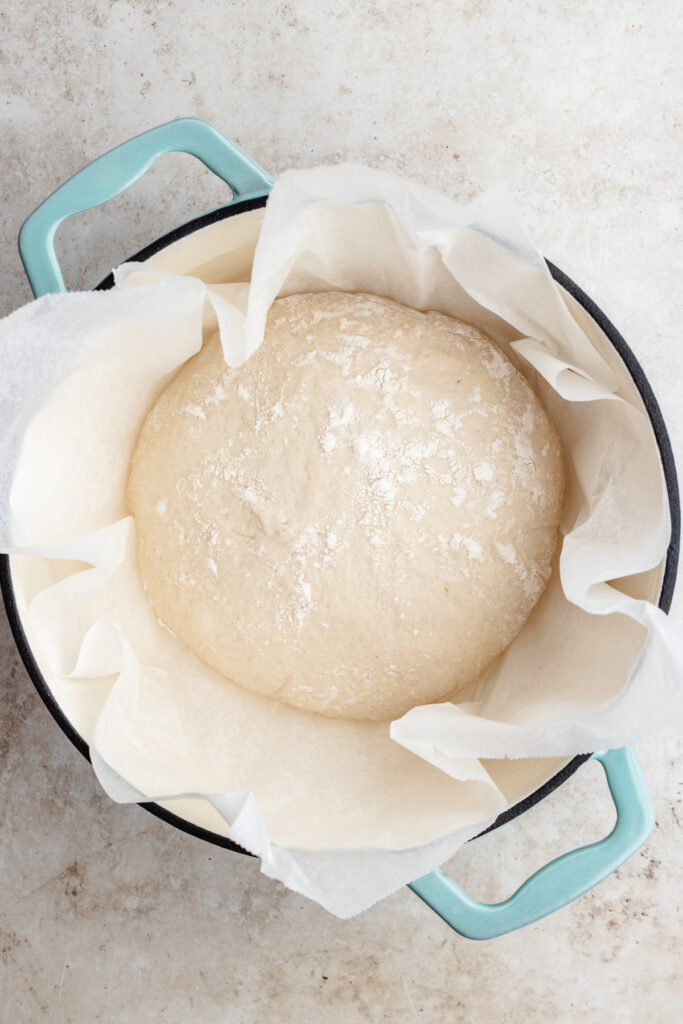
- Step 3: Cover the bowl with plastic wrap, or a kitchen towel, and let it rise until doubled in size.

- Step 4: Scrape out the dough unto a well floured pice of parchment paper. The dough will still be sticky so sprinkle with flour so it wont stick to your fingers. Gently fold the outer edges of the dough to the center to form a ball. Let it rise while the Dutch oven heats in the oven.
Step 5: Carefully take out the Dutch oven, it will be very hot! Remove the lid and gently lift the bread with the parchment paper and place inside.

Step 6: Cover the bread with the lid and bake, then remove the lid and bake for another 5-10 more minutes until the outside is golden.
Hint: After baking, remove the bread from the dutch oven, place it on a cooling rack for about 30 minutes before slicing it. Resist the urge of cutting bread when it is still piping hot! Doing this will result in compact and deflated slice of bread.
Optional Step: Stretch & Fold (For Better Texture)
For a slightly more structured crumb and a taller loaf, you can add one quick stretch and fold during the first rise.
After stirring the dough together, let it rest for 15 minutes, wet your hands and gently lift one side of the dough, stretching it upward, then fold it over itself towards the center. Rotate the bowl and repeat this on all four sides (this takes less than a minute). Cover and continue the rise as instructed.
Why it helps:
This simple step strengthens the gluten just enough to improve the texture of the bread, without turning it into a full kneading process.

Why bake the bread in a Dutch oven?
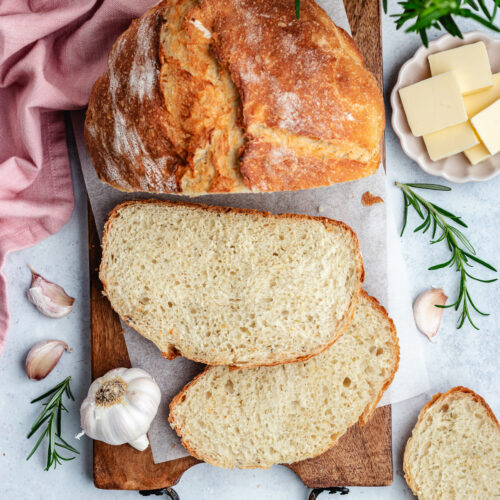
Baking this white bread recipe in a Dutch oven is one of the easiest ways to achieve bakery-quality, artisan bread in your kitchen. The Dutch oven works because it will trap the steam inside the pot while the bread bakes. The steam helps the dough rise high and creates a crispy, golden crust while the interior stays soft and fluffy.
No Dutch oven?
You can still bake this bread! Take a look at other methods below:
- Baking sheet, place the bread on a baking sheet, or baking tray, lined with parchment paper. Place a small oven safe tray filled with a little water under the bread. Or throw in a small glass of water in the bottom of the oven (not on the bread) before closing the oven door. The steam will give the bread a crispier crust.
- Cast iron skillet, preheat the skillet and then place the bread on it. Cover the bread with an oven safe pyrex bowl, enamel, or ceramic bowl and bake as directed.

Substitutions
- Flour – For the fluffiest bread with the best texture, I recommended using bread flour. I have also made this bread with all-purpose flour, if I was out of bread flour, and it works well. If using all-purpose flour, I recommend the optional stretch and fold step while the dough is rising, for a fluffier texture.
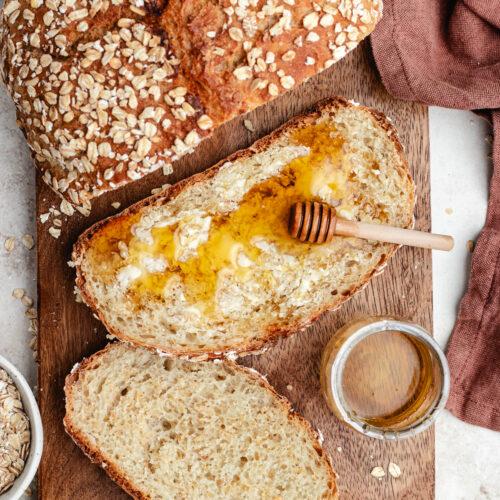
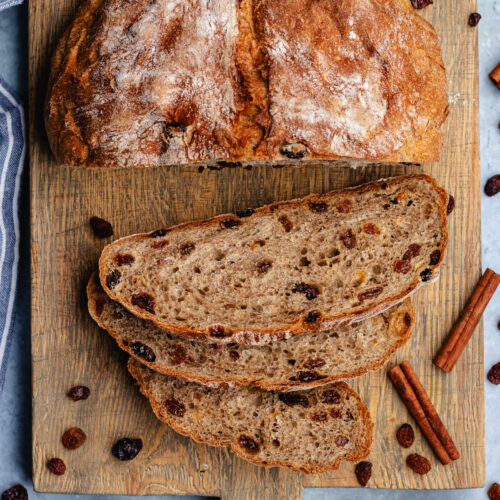
- Sweetener – This easy yeast bread recipe has just a little added caster sugar to help activate the yeast. The bread wont taste sweet, a small amount of sugar helps the rising process. If you like a sweeter bread, add more sugar or a little honey, to taste. Also check out this No knead oatmeal bread or this No knead cinnamon raisin bread for a sweeter style bread.
Variations to try
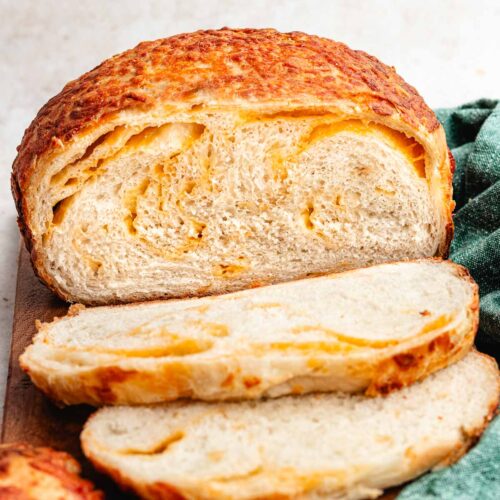
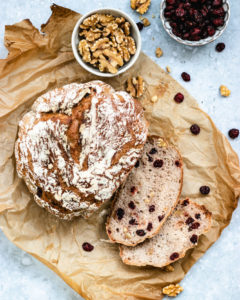
- Nuts – For a little crunch, add in some roughly chopped nuts like walnuts or pecans to the dough. Also see this Cranberry Walnut Bread loaded with walnuts.
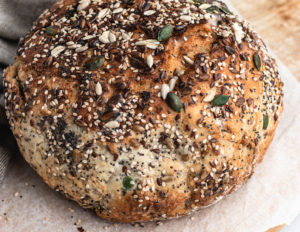
- Seeds – Top the bread with some crunchy seeds like pumpkin or sunflower seeds like in this no knead Mulitseed Bread.
- Olives – Mix in olives of choice or try this No knead olive bread recipe.
Overnight Rise in the Fridge
If you have the time, an overnight rise will take your bread to the next level. This method develops a deeper flavor, improves the texture and makes the dough easier to handle, without any extra effort!
How to do it:
- Reduce the yeast to ½ teaspoon (about 1.5g)
- Stir together the dough
- Cover the bowl tightly and let it sit in room temperature for an hour (add the optional stretch and fold step)
- Place the dough in the fridge for 10–12 hours (or up to 24 hours)
The next day:
- Take the dough out of the fridge and let it sit on the counter for about 1 hour to come to room temperature.
- Shape and continue with the second rise according to the recipe. It might need a little longer for the second rise, you want the dough fluffy and light.

How to store bread
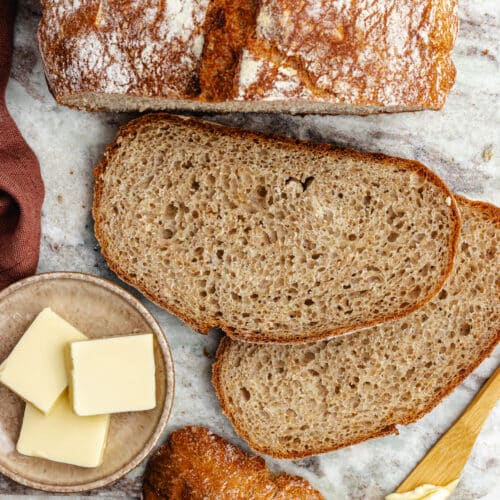
This no knead artisan bread tastes best when eaten freshly baked, like all breads! For storing, place it in a bread box, airtight container or plastic bag. Store for up to 4 days. I like to slice any leftovers before storing and then pop them in the toaster and top with a little butter.
The bread also freezes well. Use a freezer friendly plastic bag and try to remove as much air as possible before sealing the bag well. Do this to avoid ice forming when frozen. Freeze the bread for up to 3 months. Let the bread defrost in room temperature before serving, or toast a slice directly from frozen to defrost.

Pro Baking Tips (Make it perfect every time)
- Use bread flour: Higher protein content = A higher loaf, better structure and chew.
- Hydration matters: Slightly sticky dough = airy crumb (don’t add too much extra flour)
- Stretch and fold: Adding one stretch and fold after 15 minutes, will give a lighter and airier texture. This step is optional.
- Give the dough enough time to rise – Leave the dough to rise in a warm and draft free place. The dough is ready when it has doubled in size and will spring back slowly and leaves a slight dent, after lightly pushing down with your finger. If you’re unsure, wait another 10–15 minutes. Slightly over-proofed dough is usually better than under-proofed for this style of bread.
- Hot oven is key: Preheating the Dutch oven creates that crispy crust.
- Bake in a Dutch oven: Baking the bread in a covered pot will create steam for that artisan finish and crunchy crust.
- Let the bread cool: Cutting too early can make the inside gummy.
Different types of yeast
Not all yeast are the same, and using the right yeast and the right method makes a big difference.
Active Dry Yeast (What this recipe uses) Needs to be dissolved in warm water first to activate the yeast and takes a bit longer to rise. Ideal temperature: 38–43°C (100–110°F)
Instant Yeast (Quick Rise / Bread Machine Yeast) Can be mixed directly into the flour (no activation needed) Works faster than active dry yeast. How to substitute: Use the same amount, but you can skip the “activate yeast” step and mix everything together at once.
Fresh Yeast: Comes in a block that is refrigerated, crumble into warm water to activate. This yeast is very active, but has a shorter shelf life the dry yeast. How to substitute: Use about 25g of fresh yeast instead of the dry yeast.
Common Yeast Mistakes to Avoid
- The water is too hot: The water needs to be lukewarm, around 110F (40C) is a good temperature. Hot water will kill the yeast (above ~50°C / 122°F)
- The water too cold: Slows down, or prevents, the activation of the yeast.
- Too much yeast: Will result in an over-proofed bread that risks deflating.
- Expired yeast: Always check freshness! The dough will not rise properly if using old yeast. Make sure it gets foamy when mixed with the water and sugar, if not, throw it out and use a new package of yeast.

FAQ
Yes, all-purpose flour can also be used. But for the best texture, I recommend using bread flour. It has a higher protein content for a better structure to this bread.
The Dutch oven will help create a crusty outside and light and fluffy inside by creating steam while the bread bakes. If you don’t have one, no problem. You can use any oven-safe pot with a lid. Or alternatively, place the bread on a baking tray and throw in a small glass of water in the bottom of the oven (not on the bread) before closing the oven door to create steam.
Bread Recipes


I WOULD LOVE TO HEAR FROM YOU!
Let me know what you think by leaving a comment down below, and tagging me at @thedeliciousplate in your picture on Instagram. Your feedback is so helpful! Also, don’t forget to subscribe to my newsletter to be sure not to miss my latest recipes!
This Easy No Knead Artisan Bread only uses a few pantry ingredients to make a beautifully crusty loaf with a soft, airy center. It is the perfect recipe for baking homemade bread, without the hassle — no kneading and no special skills required.
- 1 ⅔ cups (380g) warm water (around 110F (40C) is a good temperature)
- 2 ¼ teaspoon (7g) active dry yeast
- 1 tablespoon sugar
- 4 cups (500g) bread flour, and more for dusting
- 1 teaspoon salt
-
In a mixing bowl, add the warm water, sugar and yeast. Let it sit for 10 minutes. Then stir in the flour and salt with a spoon. The dough will be loose and sticky.
-
Cover the bowl with plastic wrap and let it rise for about an hour or until double in size.
Optional, after 15 minutes, wet your hands and gently lift one side of the dough, stretching it upward, then fold it over itself. Rotate the bowl and repeat this on all four sides (this takes less than a minute). The covet the bowl again and let it rise for 45-60 minutes.
-
After an hour, turn on your oven to 230 C (450F). Place a Dutch oven with the lid in the oven to heat for about 30 minutes. (If you don't have a Dutch Oven, see the notes for other options)
-
Scrape out the dough onto a well floured pice of parchment paper. The dough will still be sticky, so sprinkle with flour so it wont stick to your fingers.
-
Gently fold the outer edges of the dough to the center to form a ball. Flip it around and cover with a kitchen towel for 30 minutes until the Dutch oven in hot.
-
Carefully take out the Dutch oven, it will be very hot! Remove the lid and gently lift the bread with the parchment paper and place inside. Cover with the lid and bake for 30 minutes. Then remove the lid and bake for about 10 more minutes or until golden brown and crispy.
-
Let the bread cool down for about 30 minutes before you slice it.
- Best eaten fresh baked, but keeps for about 3-4 days. Slice and freeze the leftovers so you can enjoy for longer.
-
No Dutch oven?
Place the bread on a Baking sheet, lined with parchment paper. Throw in a small glass of water in the bottom of the oven (not on the bread) before closing the oven door. The steam will give the bread a crispier crust.

Leave a Reply